Tired of that bubbling, purple, or illegally dark window tint ruining your car’s look or landing you a fix-it ticket? Knowing how to remove window tint is a valuable skill for any car owner. Whether you’re prepping for a fresh tint application, dealing with damage, or correcting a legal issue, DIY window tint removal can save significant cash compared to professional services. This comprehensive guide breaks down everything you need to know to tackle removing car window tint safely and effectively.
Why Removing Old or Bad Tint Matters
Beyond aesthetics, removing damaged or non-compliant tint is crucial. Bubbling and peeling film obstructs visibility, creating a safety hazard. Purple, faded tint degrades your vehicle’s appearance. Most importantly, excessively dark film can violate state tint laws, leading to fines. Learning how to remove window tint at home empowers you to address these issues affordably.
Safety First: Protect Yourself & Your Vehicle
- Ventilation is Key: Work outdoors or in a well-ventilated garage. Ammonia fumes are potent!
- Protect Skin & Eyes: Wear nitrile gloves and safety glasses.
- Shield Your Interior: Cover dashboards, seats, and electronics with plastic sheeting.
- Defroster Line Alert: Use EXTREME caution on rear windows – no razor blades over heating elements!
- Heat Gun Wisdom: Keep it moving constantly to avoid glass cracks.
Essential Tools & Materials
(Choose ONE primary removal agent)
- Ammonia Cleaner (e.g., Windex) OR Steamer
- Heavy-duty black trash bags (cut to window size)
- NEW single-edge razor blades + holder
- Spray bottles
- Microfiber towels (plenty!)
- Plastic scraper/old credit card
- Isopropyl alcohol & glass cleaner
- Heat gun/hair dryer (optional)
- Patience! (Old tint fights back)
Step-by-Step Removal Methods
Ammonia & Trash Bag Method (Best for sunny days)
- Prep & Clean: Wash the outside of the window. Park in direct sunlight.
- Cut Bag: Trim trash bag slightly larger than window.
- Soak Tint: Generously spray ammonia cleaner on the inside tint surface.
- Apply Bag: Immediately press bag onto wet tint, smoothing out air bubbles.
- Let it Bake: Wait 1-2 hours for sun/heat to loosen adhesive (use heat gun if cloudy).
- Peel Corner: Lift bag edge and start peeling tint downward at low angle. Spray more ammonia under film if sticky.
- Remove Film: Pull slowly in large sheets. Reapply ammonia if tearing.
- Attack Residue: Spray adhesive remover, let soak 5 mins.
- Scrape: Use NEW razor blade at shallow angle (almost flat). On rear windows: use plastic scraper ONLY over defroster lines.
- Final Clean: Wipe with isopropyl alcohol, then glass cleaner.
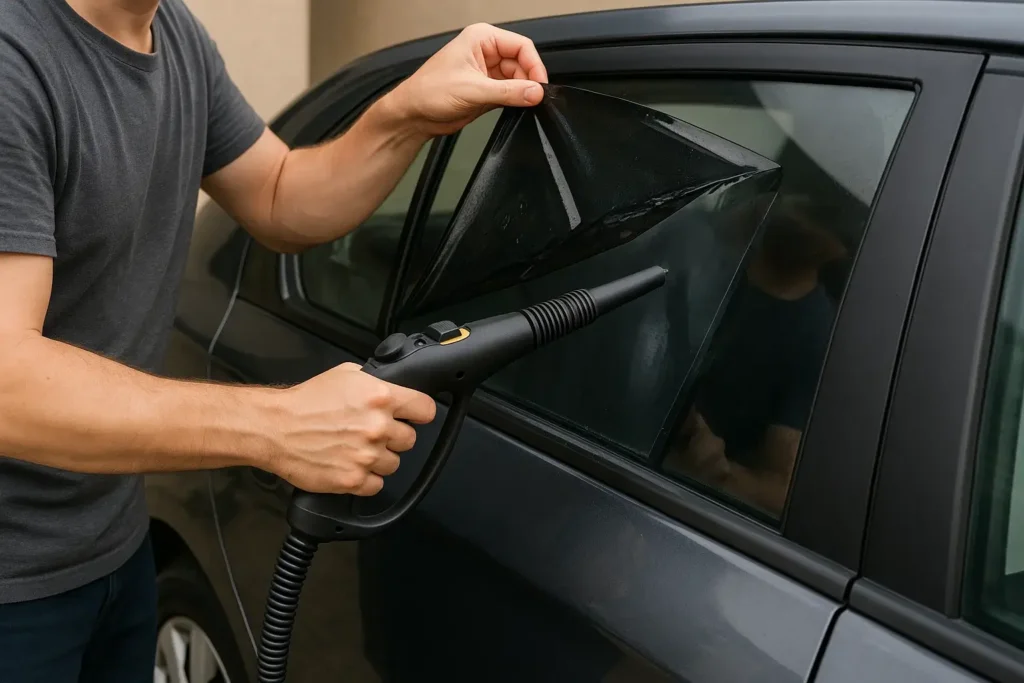
Steam Removal Method (Less messy, no chemicals)
- Protect interior surfaces.
- Steam tint edge for 30-60 seconds.
- Lift corner with plastic scraper.
- Steam ahead of peel point while slowly pulling film.
- Remove residue (Steps 8-10 above).
Heat Gun Method (Quick spot treatment)
- Heat small section (keep moving!).
- Lift edge immediately.
- Heat ahead while peeling.
- Clean residue.
7 Deadly Sins of Tint Removal (Avoid These!)
- Using dull razor blades (scratches glass!)
- Scraping at steep angles
- Rushing the soak time
- Ignoring interior protection
- Forcing stubborn film (causes tears)
- Scraping defroster lines with metal
- Using abrasive pads/steel wool
Troubleshooting Guide
Problem: Sticky residue won’t budge
Fix: Reapply remover, cover with plastic wrap, soak longer. Use heat.
Problem: Tint shatters when peeling
Fix: Apply more heat/steam + solvent. Start from different corner.
Problem: Hazy film after removal
Fix: Re-clean with adhesive remover + fresh razor blade.
Problem: Curved windows
Fix: Prioritize steam/heat. Use plastic scrapers on curves.
Key Takeaways
- Sharp razor blades + low angle = scratch-free success
- Sun + ammonia + black bag = DIY gold standard
- Defroster lines demand plastic tools ONLY
- Patience pays off – don’t rush adhesive breakdown
- When in doubt: More heat, more solvent, more time
Ready for your next upgrade? Master professional headlights cleaning or explore improving improve gas mileage. For stubborn adhesive, 3M’s automotive remover is our top recommendation.