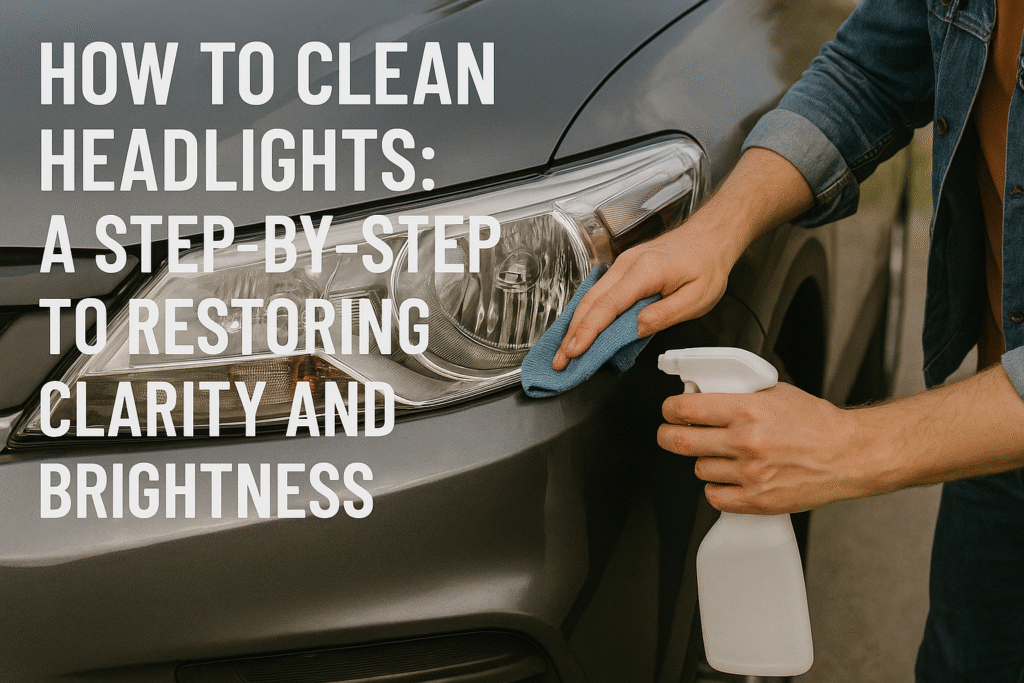
Have you noticed your headlights getting cloudy or yellowed? Over time, exposure to the sun’s UV rays, road debris, and other environmental factors can cause your headlights to lose clarity and brightness. Not only does this impact your vehicle’s aesthetic appeal, but it also reduces your visibility when driving at night or in low-light conditions. Cleaning and restoring your headlights is a relatively simple process that can significantly improve safety and the overall look of your car.
In this guide, we’ll walk you through how to clean headlights, providing you with step-by-step instructions for both DIY methods and professional solutions. Whether you’re dealing with minor cloudiness or significant yellowing, we’ve got you covered.
What Is Headlight Cleaning and Why Does It Matter?
Headlight cleaning is the process of removing oxidation, dirt, and contaminants that build up on your headlight lenses over time. Keeping your headlights clean is essential for both aesthetic and safety reasons. Clear headlights allow you to see better when driving at night or in adverse weather, improving visibility on the road.
Importance of Clean Headlights for Safety
When your headlights become clouded or yellowed, they lose their ability to effectively illuminate the road. This is particularly dangerous during nighttime driving, where clear headlights are critical to spotting hazards. Cleaning your headlights helps to:
- Increase visibility at night or in poor weather.
- Improve your car’s aesthetic appeal and resale value.
- Prevent the need for costly headlight replacements.
Common Headlight Issues
- Oxidation: Over time, plastic headlights are prone to oxidation, which causes them to become cloudy.
- Yellowing and Discoloration: Exposure to sunlight and chemicals in the environment can cause plastic lenses to turn yellow.
- Fogging and Cloudiness: Moisture or air pockets inside the headlight housing can lead to foggy headlights.
Headlight Cleaning Methods
There are several methods available for cleaning headlights, ranging from simple DIY techniques to professional restoration services. Below, we’ll explore these options to help you decide which method works best for your situation.
Manual Cleaning Techniques (DIY)
Materials Needed: Soap, water, microfiber cloth, toothpaste, baking soda, and plastic cleaner.
Step-by-Step Instructions:
- Wash the headlights using soap and water to remove dirt and debris.
- Apply a small amount of toothpaste or baking soda to a microfiber cloth and gently scrub the surface of the headlight in circular motions. Toothpaste works well because it contains mild abrasives that can help remove oxidation.
- Buff the headlights with a clean cloth to remove any excess toothpaste or baking soda and restore the clarity of the lens.
- Finish by applying a plastic cleaner to help give the headlights a glossy, clear finish.
This method is a cost-effective way to remove minor oxidation and restore headlight clarity. It’s ideal for vehicles with light cloudiness or yellowing.
Chemical Headlight Cleaning Kits
If your headlights are severely yellowed or cloudy, a chemical headlight restoration kit may be the solution. These kits typically include specialized cleaners and polishes designed to break down oxidation and restore the headlights to their original clarity.
Step-by-Step Instructions:
- Clean the headlights with soap and water to remove surface dirt.
- Follow the instructions provided in the kit to apply the chemical solution. Usually, you’ll apply the solution using a clean cloth or applicator pad.
- Once the solution has been applied, use the included buffing tool or microfiber cloth to polish the headlights and remove any remaining residue.
- Some kits will include a sealant to apply after restoration. This helps protect the headlights from further oxidation and clouding.
These kits are widely available and typically cost between $10 and $30, making them a great option for a more thorough DIY solution.
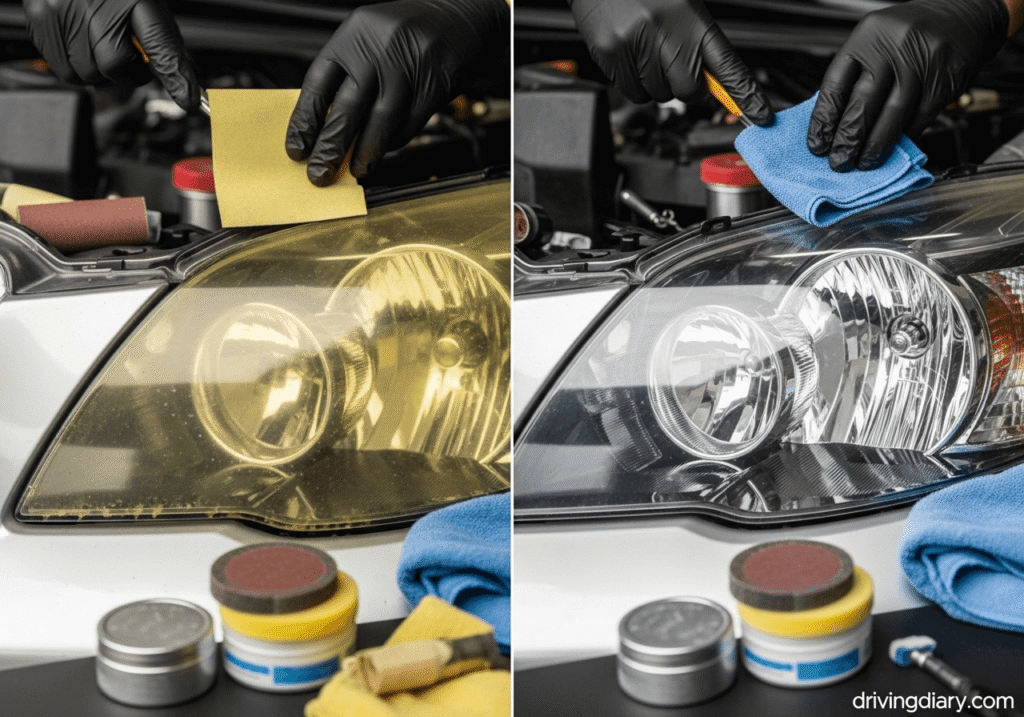
Professional Headlight Cleaning and Restoration
If your headlights are heavily oxidized, yellowed, or you’re simply looking for a more permanent solution, professional headlight cleaning and restoration might be necessary. Professionals use specialized tools and techniques to remove oxidation, buff the headlights, and apply a protective coating to keep them clear for longer.
Process Overview:
- Wet Sanding: Professionals often begin by wet sanding the headlight lenses with abrasive sandpaper to remove the outer layer of oxidation.
- Polishing: After sanding, the headlights are polished with a fine-grade polish to restore clarity.
- Sealing: To protect the headlights from further oxidation, a protective sealant is applied.
Professional restoration can cost anywhere from $50 to $150 depending on the extent of the damage and the service provider. While this is a more expensive option, it’s ideal for headlights that are too far gone for DIY methods.
Preventative Maintenance to Keep Your Headlights Clean
Once your headlights are clean, it’s important to take steps to maintain their clarity and prevent future issues. Here are some tips for keeping your headlights in great condition:
Sealing Your Headlights After Cleaning
After cleaning, it’s a good idea to apply a protective sealant to your headlights. This sealant creates a layer of protection that helps prevent oxidation and UV damage from the sun. Reapply the sealant every 6 months for optimal protection.
Regular Cleaning and Maintenance Schedule
Even if your headlights are clear, it’s important to clean them regularly to prevent buildup. A quick wash every few months will help keep your headlights free from dirt and debris. For more frequent driving in harsh conditions (e.g., dirt roads or heavy rainfall), clean your headlights more often.
Parking and Weather Considerations
Where you park and how you care for your car can also affect the longevity of your headlights. Parking in a shaded area or using headlight covers can protect your headlights from direct UV exposure and help maintain clarity.
")
Troubleshooting Common Headlight Problems
Even after cleaning, you might encounter persistent issues with your headlights. Here’s how to troubleshoot and address some common problems:
Dealing with Persistent Oxidation
If your headlights still appear cloudy after cleaning, it could be due to deep oxidation that DIY methods can’t fully address. In these cases, you may need to wet sand your headlights or take them to a professional for a more thorough restoration.
Fixing Headlights That Keep Fogging Up
Foggy headlights can occur when moisture gets inside the headlight assembly. If you notice condensation inside your headlights, check for cracks or broken seals and replace any damaged components. Sealing the headlight properly can prevent further moisture buildup.
Cost Considerations for Headlight Cleaning and Restoration
Cleaning and restoring your headlights can vary in cost depending on the method you choose:
Cost of DIY Headlight Cleaning
DIY methods are the most cost-effective. You can purchase basic supplies such as toothpaste, baking soda, and plastic cleaner for just a few dollars, and chemical cleaning kits typically range from $10 to $30.
Price of Professional Headlight Cleaning and Restoration
Professional services typically cost between $50 and $150, depending on the severity of the oxidation and the restoration methods used.
Conclusion: Keep Your Headlights Clear and Safe
Headlight cleaning is an easy and affordable way to restore your vehicle’s appearance while improving safety. Regular cleaning and maintenance can prolong the life of your headlights, ensuring that your car remains visible and roadworthy.
Key Takeaways:
- Regular cleaning can prevent buildup and keep your headlights clear.
- DIY cleaning methods like using toothpaste or headlight restoration kits are effective for minor oxidation.
- Professional restoration is ideal for heavily oxidized headlights.
- Protect your headlights with a sealant to prevent future issues.
By following these simple steps, you can ensure your headlights remain clear, bright, and ready to help you see the road clearly, day or night.