The radiator is one of the most critical components of your car’s cooling system. Without it, your engine would quickly overheat and fail. Over time, car radiators can experience wear and tear, leading to a range of issues that can affect your vehicle’s performance. In this comprehensive guide to car radiator repair, we’ll explore common signs of radiator issues, troubleshooting steps, repair instructions, maintenance tips, and when to seek professional help.
What Is a Car Radiator? Understanding Its Role in Your Vehicle
Before diving into repairs, it’s essential to understand what the radiator does and why it’s so important for your vehicle.
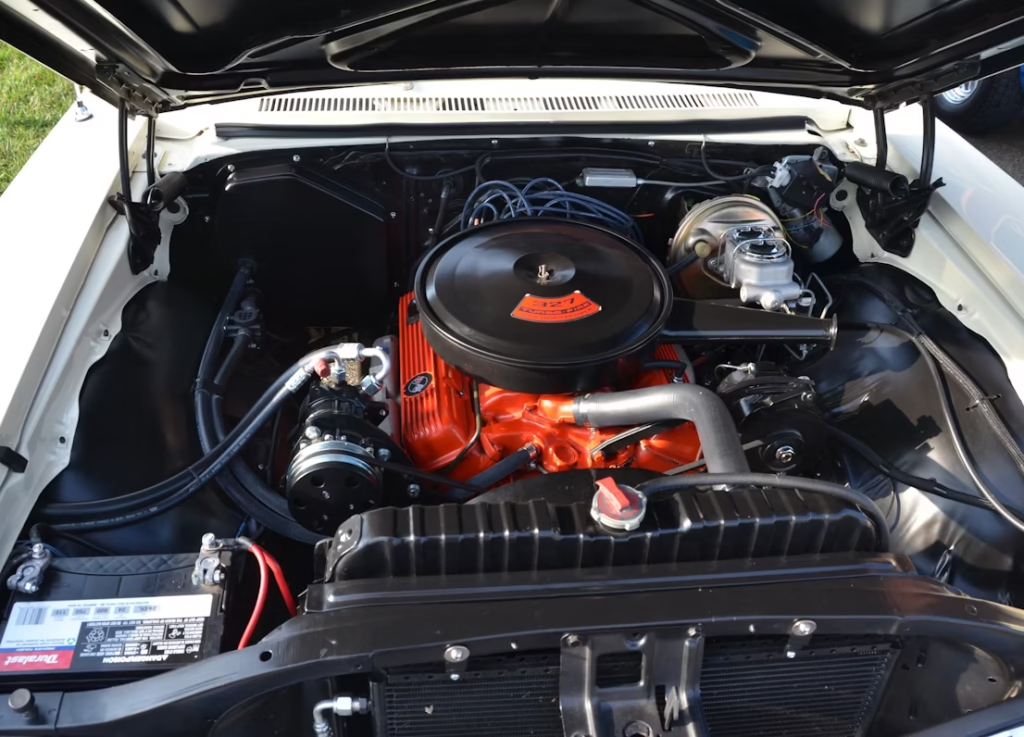
A car radiator is a part of your car’s cooling system, designed to prevent the engine from overheating. It works by dissipating heat from the engine coolant, keeping the engine at an optimal temperature. The radiator circulates coolant (a mix of antifreeze and water) through the engine to absorb excess heat. This heated coolant then passes through the radiator, where it is cooled down before circulating back through the engine.
Understanding your radiator’s role helps you identify when something goes wrong and empowers you to perform necessary repairs or seek professional assistance before further damage occurs.
Signs Your Car Radiator Needs Repair: Identifying Common Issues
Car radiator issues often manifest in noticeable symptoms. Here are some key signs that your radiator may need repair:
1. Overheating Engine Warning Light
The most obvious sign that something is wrong with your radiator is the overheating engine warning light. If this light comes on, it’s time to check your radiator and coolant system to ensure everything is functioning properly.
2. Coolant Leaks or Puddles
If you notice puddles of coolant under your vehicle, it’s a clear sign that there’s a leak in the system. Leaks can occur due to cracks in the radiator or worn-out hoses.
3. Unusual Engine Temperature
If the temperature gauge on your dashboard shows an unusually high reading or if the engine feels abnormally hot to the touch, the radiator might not be cooling properly.
4. Strange Odors
A strong, sweet odor (often described as the smell of burnt antifreeze) can indicate that coolant is leaking and evaporating, which is a sign of radiator failure.
5. Strange Noises
Hissing, gurgling, or bubbling sounds coming from the radiator could point to trapped air or a problem with the cooling system. These noises may indicate a failure of the radiator cap or a blockage in the radiator.
Recognizing these signs early can help prevent more extensive damage and costly repairs down the road.
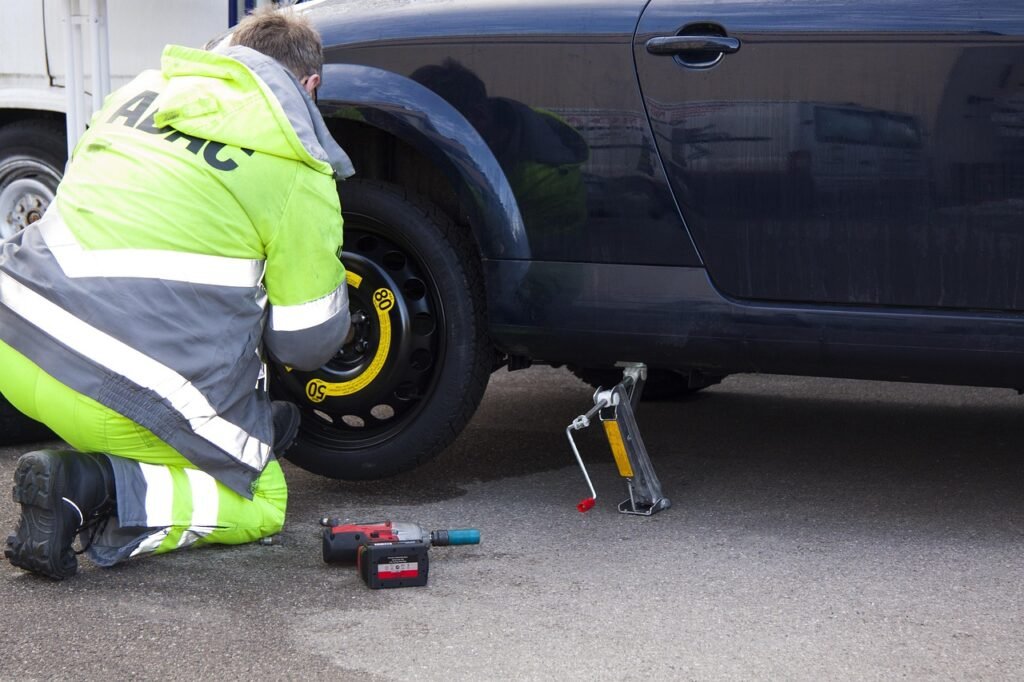
How to Troubleshoot a Faulty Radiator: Step-by-Step Guide
If you suspect your radiator is the problem, troubleshooting the issue yourself can save you time and money. Here’s how to do it safely and effectively:
Step 1: Ensure Safety
Before inspecting the radiator, make sure the engine is off and has cooled down completely. Hot coolant can cause serious burns.
Step 2: Visual Inspection
Look for any visible cracks, leaks, or corrosion on the radiator and surrounding areas. If you see coolant puddles under the car, this is a clear indication of a leak.
Step 3: Check Coolant Levels
Low coolant levels can cause overheating. Open the radiator cap (only when the engine is cool) and check if the coolant is at the proper level. If it’s low, top it off with the appropriate coolant mixture.
Step 4: Inspect the Radiator Hoses and Clamps
Examine the radiator hoses and clamps for any signs of damage. Cracked or loose hoses can lead to coolant leaks, while improperly tightened clamps can cause the hoses to slip off.
Step 5: Test the Radiator Fan and Thermostat
The radiator fan should kick on when the engine reaches a certain temperature. If the fan isn’t working, it could be a sign of a blown fuse, faulty wiring, or a broken fan motor. Similarly, a malfunctioning thermostat can prevent the coolant from circulating properly.
Step 6: Conduct a Pressure Test
For more advanced DIYers, a radiator pressure test can help identify leaks that aren’t visible to the naked eye. This test involves using a radiator pressure tester to simulate the pressure inside the cooling system and spot hidden leaks.
Step-by-Step Car Radiator Repair: Can You Fix It Yourself?
If you’ve identified a problem with your radiator, you may be able to handle the repair yourself. Here’s a step-by-step guide on how to fix common radiator issues.
Tools and Materials You’ll Need:
- Wrenches and pliers
- Replacement radiator or radiator sealant
- Coolant
- Gloves
- Screwdrivers
- Replacement hoses (if necessary)
- New radiator cap
Step 1: Removing the Damaged Radiator
- Start by turning off the engine and allowing it to cool.
- Drain the coolant from the radiator by removing the drain plug.
- Use a wrench to disconnect the hoses and remove the radiator. Take note of how the hoses are connected for easy reassembly later.
Step 2: Inspect and Repair
If the damage is minor, such as small cracks, you can use radiator sealant to patch the holes. Follow the manufacturer’s instructions carefully for the best results.
Step 3: Replace or Repair the Radiator Fan, Hoses, and Clamps
If the radiator fan or hoses are damaged, replace them with new parts. Ensure all hoses are securely attached and properly tightened.
Step 4: Refill Coolant and Test for Leaks
After the repair, refill the radiator with the correct coolant mixture. Start the engine and let it run for a few minutes. Check for leaks, and monitor the temperature gauge to ensure the radiator is functioning properly.
Step 5: Reassemble and Test Drive
Once you’re sure everything is properly reassembled and sealed, test drive the vehicle to make sure it runs at the proper temperature. Keep an eye on the dashboard to ensure no warning lights come on.
Car Radiator Repair vs. Replacement: What’s Best for Your Vehicle?
Sometimes, the damage to your radiator is too extensive to repair. Here’s how to determine whether you should opt for repair or replacement:
When to Repair:
- Small leaks that can be patched with sealant.
- Minor cracks or damage that doesn’t affect radiator function.
- Low-cost repairs that extend the radiator’s life.
When to Replace:
- Severe cracks or damage that can’t be sealed.
- Rust or corrosion that affects the radiator’s structural integrity.
- Overheating persists despite repairs.
- Aged radiators that are near the end of their lifespan.
Replacing a radiator can be costly, but it might be the only option if the damage is beyond repair. Always weigh the costs of repair versus replacement based on your vehicle’s age and condition.
Common Mistakes to Avoid When Repairing Your Car Radiator
DIY repairs can save money, but they also come with risks if not done properly. Avoid these common mistakes during radiator repair:
- Not Allowing the Engine to Cool Down: Working on a hot engine can cause burns and lead to more damage.
- Using Incorrect Coolant: Always use the correct type of coolant for your vehicle to avoid causing further damage to the radiator and engine.
- Over-tightening Clamps: Tightening the hoses too much can damage the rubber, causing leaks or even ruptures.
- Neglecting to Inspect Other Components: Don’t just replace the radiator—inspect the thermostat, fan, and hoses for other potential issues.
When to Seek Professional Help: Knowing Your Limits
While DIY repairs can be cost-effective, some radiator issues require professional intervention. You should seek professional help if:
- The radiator is severely damaged or corroded.
- You are unable to pinpoint the cause of overheating or leaks.
- There are complex electrical issues (e.g., fan or thermostat malfunction).
- You’re uncomfortable handling coolant or working with the car’s cooling system.
A professional mechanic can diagnose and fix the issue efficiently, ensuring your car stays safe and functional.
How to Maintain Your Car Radiator: Tips for Longevity
Proper maintenance is key to extending the life of your radiator. Follow these tips to keep your car’s radiator in top shape:
- Regular Coolant Flushes: Change your coolant every 30,000 miles or as recommended by your vehicle’s manual.
- Routine Inspections: Check for leaks, debris, and damage during routine maintenance.
- Protect the Radiator: Avoid road debris and keep the front grill clear of dirt and leaves.
- Monitor the Temperature Gauge: Keep an eye on the engine temperature and address overheating issues immediately.
Conclusion: Is Your Car Ready for Radiator Repair?
Car radiator repair doesn’t have to be a daunting task. With the right tools, knowledge, and preparation, you can troubleshoot, repair, or replace your radiator with confidence. Always prioritize safety, and remember that when in doubt, professional help is a great option. By following proper maintenance practices, you can extend the lifespan of your radiator and keep your engine running smoothly for years to come.For more automotive tips, feel free to explore our related guides on coolant system maintenance and engine overheating solutions.
FAQs About Car Radiator Repair
How long does a radiator repair take?
A basic radiator repair may take a few hours, while a full replacement could take up to half a day or longer, depending on the vehicle.
Can you drive a car with a broken radiator?
It’s not advisable to drive with a broken radiator as it can cause the engine to overheat, leading to further damage.
How often should I check my radiator?
Inspect your radiator every 6 months to ensure it’s in good condition and top off the coolant as needed.